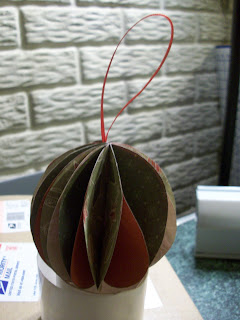
I found this idea on Pinterest at this blog. I thought they looked cute and easy so I gave it a try. I took pictures while making the first ornament I attempted, so it's not as good as the ones I actually gave as gifts. I learned a lot as I went!
First I cut out 12 circles. I used three different papers and 3" circles.Then I folded them in half and stacked them together. I used the blog's guide for stacking: If using 3 colours A B C, then stack them in the order ABBCCAABBCCA.
Next I used a stapler to attach all the circles together. I used colored staples just to make thing prettier, even though you don't see the staples at all. Later, I also started putting a ribbon in the middle of the circles and stapling it in as a way to hang the ornament.
Next I used a glue dot about 1/3 of the way up from the bottom and pressed the flaps together. On the next flap, I placed the glue dot 1/3 from the top and pressed those flaps together. This alternates all the way around. I found that the flaps that are on the folds of the circles don't stay together very well, so for these I used a bigger glue dot.
I learned several things making these ornaments:
1. Thin paper is best-the thinner the better.
2. Double sided paper works best that way it's pretty all the way around.
3. I used 2 different pieces of double sided paper for a total of 4 patterns. I used this guide for 2 papers: If using 2 colours A B, then stack them in the order ABBAABBAABBA.
4. Put the ribbon in the middle of the stack of circles; between circles 6 and 7.
5. Use the biggest glue dots you can. The flaps will continuously come apart.
The finished product. This is not the same ornament as in the pictures above. The first ornament didn't turn out very well, so this is a picture of one of the better attempts.
I used them on the dinner table to make it festive and my family each took one home as a gift. I will probably try something else next year, but this was a fun first time ornament making experience!


No comments:
Post a Comment